Ideally, thin film growth should start with a
step-and-terrace surface where all step edges
have equal, single unit cell height (0.4 nm for SrTiO3) and the steps
should be approximately parallel and equidistant. For heterostructure
and ultrathin layer studies, it is also important to ensure that the
terminating layer of the surface is well controlled. In the case of SrTiO3 (001) substrates,
the crystal can be terminated either by a SrO or a TiO2 layer.
Since the TiO2 layer is more stable, we usually try to prepare
a uniform TiO2 termination.
Although AFM images cannot identify whether the surface terminates with the
SrO or the TiO2 layer, a uniform terminating layer can be assumed
if all step edges have equal 0.4 nm height. To obtain such surfaces,
a substrate usually goes through several processing steps.
SrTiO3 substrate preparation steps
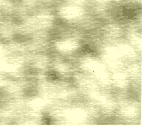
This is what a polished substrate looks like when imaged by AFM.
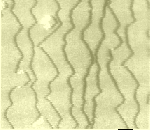
It is possible to obtain a step surface by annealing a polished
substrate at low oxygen pressure, but this leaves the surface
with a mixed termination, with some parts covered by a SrO layer
and other places by a TiO2 layer.
Wet etching is chemically selective. The buffered HF removes
preferentially Sr, ensuring that the surface is purely Ti terminated. Despite near-perfect
stoichiometry, an etched surface is not stable at high temperature.
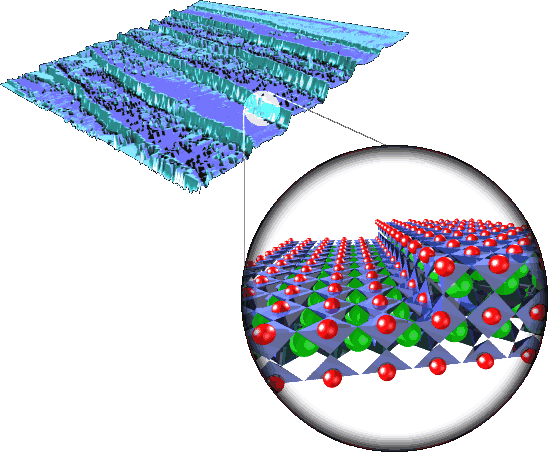
Annealing at low oxygen pressure gives a near-perfect
step-and-terrace surface, which is mostly Ti terminated. There are no macroscopic
Sr islands on this surface. All steps have single unit cell, 0.4 nm height.
Steps are not bunched and the step direction is determined by the crystal
miscut direction.
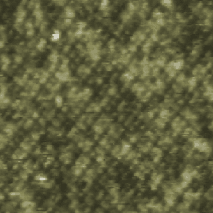
The annealed surface often shows a 2×2 reconstructed
RHEED pattern. A rather well ordered structure on the unit cell scale can be obtained
by long annealing at relatively low temperature.